“BALLS 8”
One of my “projects” that I have wanted to do for some time is the NASA/Edwards AFB Flight Test Center’s NB-52 “Balls 8”. It’s a bit of an iconic aircraft, one I got up close to and crawled around back in the mid 90s while flying as an E-6 TACAMO crewman. Edwards AFB was an alternate Alert site for us, and whenever we got diverted into there I always took time to go “have a look around” while confined to the Flight Line area. She just happened to be down the line from us so a few of us walked over to have a look while “off the hook” for a few hours. She had just recently been re-engined out at Tinker AFB OK, our homebase, and I recalled seeing the tall “B” model tail with the yellow “NASA” band on it from way across the field. I honestly thought at the time that it had long been retired!
I picked up the Monogram NB-52 with X-15 a few years ago at a show. Not long after I came across a Muroc Models X-38, and decided I would build it with that on the pylon since I had the Cutting Edge decal sheet featuring Balls 8’s history and the most up to date “scoreboard” with the silhouettes of projects it launched throughout its long history at Edwards AFB.
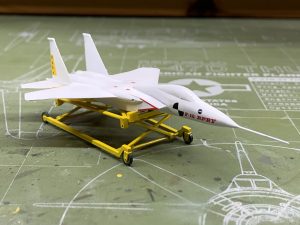
Digging into the ol’ research rabbit hole, I discovered that…no, the X-38 was not the last project to drop launch from “Balls 8”, it was the X-43/Pegasus rocket hypersonic vehicle combo. Damit it! OK, surely there’s a 1/72 scale kit out there of it?! There is! A limited run resin kit. But it is/was out of production. I found out who made it, “Jett Models”, and that they only sold on eBay. I found the maker’s eBay store and messaged him. He had two left, one for himself, and one for me…if I was willing to pay for it. Wasn’t cheap but once I go down these paths I tend to get locked on.
So, OK, it would be the X-43 mounted on the pylon, and then the idea hit me that I should have the rest of the projects “Ball’s 8” carried displayed with her.
That would be:
- X-15 (Monogram, X2 because I want to do the white coated version as well).
- M2-F2/F3 Lifting Body (AMP)
- I had the Anigrand kit for both the M2-F2/3 and HL-10 but sold them upon hearing that AMP is releasing injection molded kits of them.
- HL-10 (AMP has reditions on their Facebook page…no release date yet.)
- X-24A and B (Mach 2 kits…I know but really the only game in town unless AMP goes there as well).
- F-15 RPRV
- (1/200 scale 3D model to replicate the 3/8 scale RPRV. Printed by fellow SQMD club member Dave Fuller. Muroc Models did one of these but it is OOP/HTF/RARE).
- HiMAT RPRV (Muroc Models. Again courtesy of SQMD member Dave Fuller).
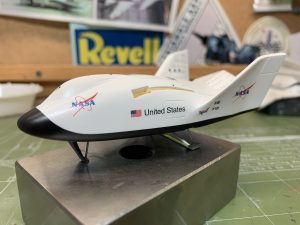
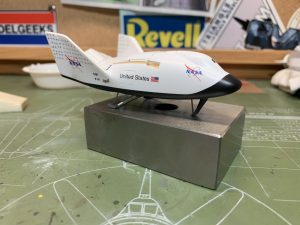
- X-38 (Muroc Models)
- X-43 HyperX (Jett Models)
In venturing further down the ol’ rabbit hole, I discovered two more items dropped/launched from “Balls 8”, the Ryan Firebee DAST, and also Space Shuttle solid rocket boosters (SRB) to test the parachutes…so, I need to track down one of those to modify, and probably can scratch build a Firebee DAST using a drone from the DC-130A kit. I also know that the F-111 crew escape capsule was dropped from her bomb bay, and I may track down one of the old Revell kits that features that as a separate item in the kit.
So far I have completed 3 of the projets: the X-43, the X-38, and most recently the HiMAT. I am in work on the F-15 RPRV. My plan is to build all the projects (not necessarily all in a row…) prior to the NB-52B…otherwise I might lose the mojo to build them after having the NB-52 completed.
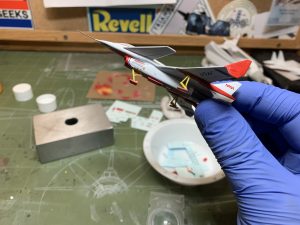
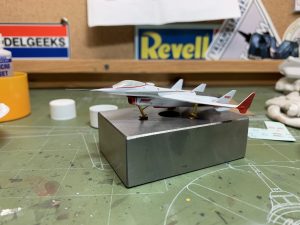
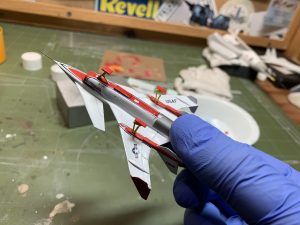
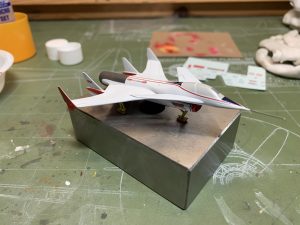
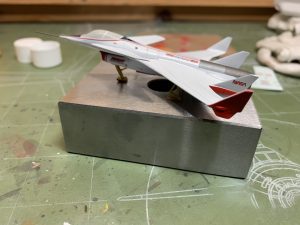
The X-43 was very well molded, required minimal cleanup and assembled quite easily. I used magnets to attached the X-43 to the Pegasus booster so that it is removable. The kit came with a resin copy of the kit pylon along with the mount for the Pegasus rocket to mate with the modified resin pylon. The only challenging part to the build was the decals. They are printed on one sheet of water slide film and I should have overcoated them with Microscale Liquid Decal film. They included fine looking fastener detail for the X-43…that immediately slid off individually from the film and floated about in my water dish : ( Luckily I had a set of Mike Grant Decals rivet/fastener decals that I was able to used to replicate the fasteners.
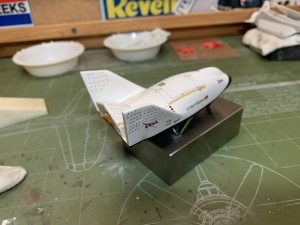
The X-38 kit comes as one solid piece of resin…a real paper weight! It is nicely molded with some surface detail. There were some tiny air bubbles to be filled but once sanded everything looked ready for paint. I used strips of Tamiya tape to replicate the parachute straps and replace the kit chute with one made from Miliput. The landing skids and nose “landing gear” were a little challenging. You are provided a piece of steel rod to make the struts and a length of square plastic rod to make the main gear side struts. All are cut to fit with measurements provided in the instructions. Holes are marked but require you to drill out to set the struts into. I used 5 minute epoxy for this endeavor, to give myself some wiggle room for alignment. I did the nose landing skid first, let it set up and then the mains so that it could sit on the nose skid while fiddling with the main skids. Once set I let it sit for a lot longer than 5 minutes.
The decals were again on one solid sheet that require individual cut out. I didn’t like the detail of the “NASA” logos but would you know, I had just come back from the 2025 IPMS USA Nationals and the convention decal sheet includes an assortment of NASA logos! The Muroc Models decals went down well enough, including the larger decals that make up the aerodynamic surface tufts on the vertical tail and aft fuselage areas.
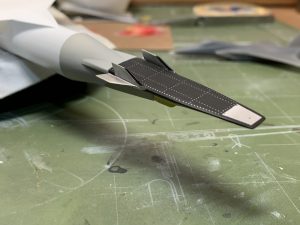
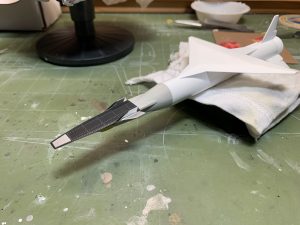
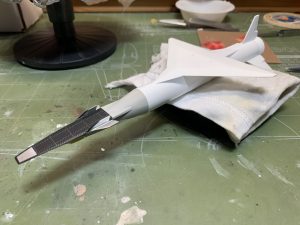
The Rockwell HiMAT (Highly Maneuverable Aircraft Technology) kit from Muroc Models was a little more challenging than the X-38. I knew from the start the paint scheme and decals would require some planning, some tedious masking, and fine trimming skills…because again, all on one solid piece of film and lots of tiny decals.
The kit required a lot of sanding and thinning of tail areas and fins. Some areas required filling with super glue to fill in air holes. The long pitot tube is metal and molded solidly into the resin fuselage., I never worried about breaking it, and it provided a good place to hold the model. The landing skids on the kit are resin molded and required some careful cleanup. No holes are marked for where the skids mate to the struts, so looking at some reference photos helped. All in all not a terrible build.
I feel like I have the more challenging kits of the project out of the way…although the Mach2 X-24A and B ought to be quite fun! I did recently pick up some resin seats and some photo etched instrument panels for them. The Monogram X-15s look easy enough and are nice little kits. I got decals for them through JBOT decals to do the white Ablative coated version. The remaining lifting bodies I will pick up from AMP, the Anigrand kits did not look fun at all!
Thank you for following along! I’ll make further updates to this thread as I progress through the project.
Cheers!
-Whitey
30 Aug 2025
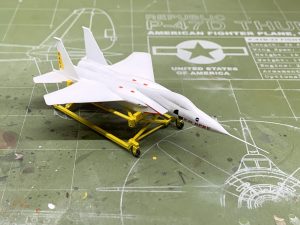
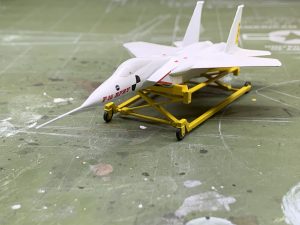
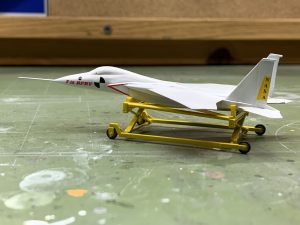
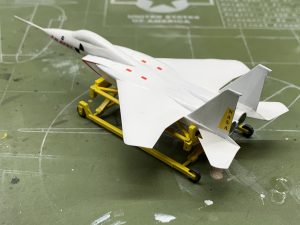
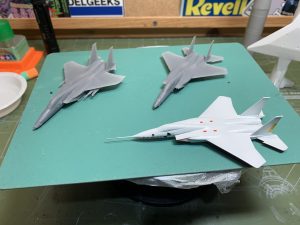
The latest NB-52B “project” completed is the F-15 Remotely Piloted Research Vehicle (RPRV), a 3/8-scale model of the USAF’s F-15 fighter aircraft. The F-15 RPRV was air launched from the NB-52 flying at 45,000 feet and was controlled by a pilot in a ground cockpit complete with flight controls and a television screen.
Muroc Models did one of these in 1/72 scale, but it is very hard to find (VHTF!!). I was however able to download the instruction sheet from Scalemates to get a look at the markings, what a resource! Fellow Southern Maryland Scale Modelers club member, Dave Fuller, offered to 3D print me an F-15 to make the RPRV. A 3/8 F-15 scaled out to a 1/72 scale model works out to 1/200 scale. I modified the printed model to represent the F-15 RPRV. Adding the nose test probe, modified the vertical stabs, and the engine exhausts as well as removing the weapons pylons on the wings.
I made the decals on the ol’ home printer using fonts found online.
I’m not sure what “project” I’ll build next, maybe a MACH2 X-24B?? Yikes.
Whitey
Subscribe here for updates from the Model Geeks Podcast: